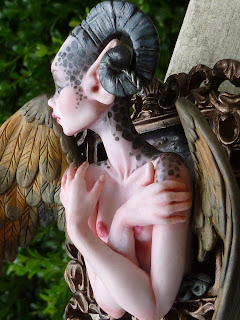
I started with the head, definitely my favorite part to sculpt.
After I get the head and face the way I want, I move on to the body. I usually sculpt the body in sections or layers, baking the piece between each layer. The arms and hands are normally the last part to be added.
Now to make her wings.I went with a gold and brown color.
Secure her in the frame and add her wings and horns.
Now she ready to have details painted on.
And she is all done and ready to be featured in my Gallery in the Dragon Con Art Show in September.
Keep checking my blog for updates on what pieces I will be bringing to the show.
Thanks for reading!
~Caralyn


No comments:
Post a Comment
Note: Only a member of this blog may post a comment.