I was excited to get started on this sculpture because I had never attempted a Phoenix before nor had I ever sculpted a feathered creature this large before. The piece is only around 6 inches but I usually work on a smaller level so anything over 4 inches is big to me.
I began this piece with the torso. Started with just a polymer clay blob in the shape of a bird...sort of in the shape.
 |
| I used glittery polymer clay to give a nice whimsical effect. |
 |
| Insert a glass bead for an eye. |
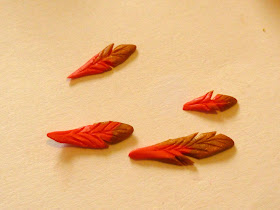
For larger feathers, I start with a cane (a polymer clay rod of two or more colors; the colors inside the rod are constructed in such a way to form an image) I used orange and gold and shaped the pieces of polymer into tear drops, then I used a pointed tool to make the lines. I made the feathers for the wings in this same fashion...more on sculpting the wings later.
No Phoenix is complete without an impressive head plumage. Rolled out some gold and orange rods over thin crafting wire and attached them to the head, bending and curving each one. A hook was hidden among the plumage so the Phoenix could hang.
 |
| That's some fine plumage ya got there. |
On to the wings! One of the most time consuming parts of this piece. Sculpt a thin layer of clay over thicker gage craft wire, then make a general wing shape, leaving some of the craft wire showing for the feathers.
Using the same method I used for the larger feathers previously, make several more; various sizes.
Then it's just a matter of laying the feathers on the wire. Do this on the front and back of each wing.
As I place each feather I have to be conscious of the way a bird's wings flow. Making sure to have the longer feathers on the tips and ending with the smaller ones in the center, close to the body.
After each feather is in it's place, I draw details on each one with a pointed tool.
 |
| He can fly anywhere now. :) |
Last bit of the sculpting part is to attach all your pieces and bake your sculpture.
 |
| Ready to baked! |
 |
| and LO there was much wailing and gnashing of teeth. |
After painting a few details my Phoenix is ready for his Dragon Con debut.
I hope you enjoyed following my process on making my Phoenix.
You can find several Step by Step Processes in my blog and check out my other social media sites for my latest pieces.
Thanks for reading!
~Caralyn


No comments:
Post a Comment
Note: Only a member of this blog may post a comment.