Come enjoy my world of Fantasy and Steampunk creations.

Mystic Reflections' Creations

Mystic Reflections' Creations

Caralyn's Events and Appearances

  • Aug. 30th - Sep. 3rd - DragonCon: Atlanta GA
  • Feb. 23rd-24th 2018 - ConNooga, Chattanooga TN
  • Nov. 17th-19th 2017 - Atlanta Steampunk Exposition: Atlanta GA
  • Nov. 11th - 12th 2017 - Christmas at Lithia Springs High school, Lithia Springs GA
  • Oct. 7th 2017 - RevFest: Rev Coffee Smyrna GA

My Blogs

Let's see what I have been up to. :)
Showing posts with label ooak. Show all posts

Thursday, May 17, 2018

I say Gryphon and you say Griffin

Back again with a Step by Step blog for you all today. :)
I am working hard on building my inventory up for the Dragon Con Art Show in September. Last Dragon Con cleaned me out so I will have a whole bunch of new pieces this year. 
So here is one of my gallery pieces, a Gryphon (Griffin) and I am super excited about it because this is the first one of these I have made on this scale(over 3 inches) before.  
As always, I started with the general shape I wanted, used glass beads for the eyes and began to sculpt small details into the face and torso. I wanted this Gryphon to look sort of like a parakeet so I kept his beak short.

Also I wanted my gryphon to have feline-like back legs and bird-like front legs. So I made his little clawed feet and began to build then up with hair. Giving him a puffy chest.

Time to add some color to our guy. I normally start with colored polymer clay but since I wasn't sure what color I wanted when I started, I had to use white. It didn't take me long to figure out his color scheme though. Since he was already very parakeet-esque I went with blue and white.

Now to add some ears, because a gryphon without ears is just a bird with a lion butt. LOL  
(Fun Fact: Back when the crest or suit of arms was just an animal head, the gryphon would often be mistaken for a bird or eagle head so it was then always depicted with ears to clear up any confusion.)

Now usually I am diligent about photographing my steps but with this piece I got super excited and neglected to take pictures of my process of making the wings for this guy. No worries, my phoenix I did last year is happy to help with an explanation collage. :)
Traditionally gryphons only have one set of wings but our guy needs to be special so he gets two! I couldn't decide which position I wanted , open or folded, so I went with both. That is one of the great things about fantasy creatures, you can make them look however you want, your imagination is the limit. :)  
I like my gryphons to be very cat-like aswell so this little one is going to get a nice fluffy tail to finish him off.


He is all sculpted, now we can paint small details to our sculpture.


Our Little Gryphon is ready for his Art Show debut.
This sculpture will be available in September at the Dragon Con Art Show.  
Hope you enjoyed my step by step blog.
Check out my social media sites for more of my artwork. :) 
Thanks for reading!
~Caralyn 

Wednesday, May 9, 2018

Giving Little Red her Hood

In many of my blogs I have walked you through, step by step, how I make my fairies/Myxies, framed or other. Here are a few of my step by step fairy blogs if you missed them. :)
Step by Step Unicorn Fairy
Step by Step Robin's Egg Fairy 
Step by Step Framed Fawn
Step by Step Myxie
I usually start with the head and move onto the torso, finishing up with the hands and feet. In this blog I am going to tell you a little about the process that comes after you have finished sculpting a piece.
With this piece I also sculpted her some white gloves. For form fitting clothing such as gloves or stockings, I usually use clay to avoid a bulky look on such a small sculpture.
I don't always jump around with a piece but this one had a small accessory that I was anxious to get started on. With white polymer clay I sculpted a fun tiny Wolf Mask. This mask would be the focal point of the sculpture. I cut out the wolf shape and sculpted teeny swirls into the face. Added a stick and baked for a lovely masquerade prop.

My Unicorn Fairy modeled my mask for me. 
After I have completed sculpting my piece and attaching it to the frame or base or whatever they will be displayed on, I then paint tiny details to the face and body. I like to use colored Polymer Clay because I think it gives a softer look than painted clay so the small details are the only parts that will be painted. For the pink skin hues I use chalk pastels, again it is softer than using paint in my opinion. I shave some of the chalk dust off and use a paint brush to add the color to the sculpture's skin. Then I use acrylic paint to add the color around the eyes, lips, eyebrows and details on the fingernails.


For this sculpture I am giving her eyelashes. I cut small strands of doll hair and glue them in place one at a time. This is super time consuming but I haven't figured out a better method of getting realistic eyelashes. I then coat the hair with gloss to keep it stiff. Now my girl has lashes.
Her gloves are then painted and jazzed up with some black beads.

Now lets get this lady some clothes.
By taking small sections of fabric and gluing them in place on her torso, I can make a fun little dress without even using a sewing machine. Sometimes hand sewing is required but it never takes long on such a teeny doll. I made all her clothes and accessories black and white so when I added her Red cloak it would POP!

But before we can make her Riding Hood, we must give this girl some hair. I portion small sections/locks of doll hair out and glue each small lock to her head. I start at the base of her skull and keep building lock over lock until her head is full. Then I style it.
Time to give her a Hood. For the cloak I mostly hand sewed and then glued it in place. Since this piece is a framed sculpture, I didn't want the hood to move too much so it would not mess with the look of the piece.
She is All Done! Little Red Rising Hood is ready for he fairytale.


So I hope that explains a little more of my after sculpting process. When you work with mixed media, your work is not done just because you finished sculpting.
This lovely piece will be available in September at my Dragon Con Art Show Gallery.
Thank you all for reading.
~Caralyn    

Monday, March 12, 2018

And then a Cutethulhu was Born...

Hello Art Fans!
Today I am going to be walking you through how I make one of my Cutethulhus. These little baby Cthulhus are a fan favorite and I have a difficult time keeping these tiny Eldergods in stock. But I do enjoy working on these little maddening dears so it is never long before I have another batch sculpted.
Anyway, let's show you all how these sweet dream thieves get created.
I usually make them all in varying shades of green polymer clay. I start with a fat clay rod.
Shaping a ball at the end of the rod gets the head started.
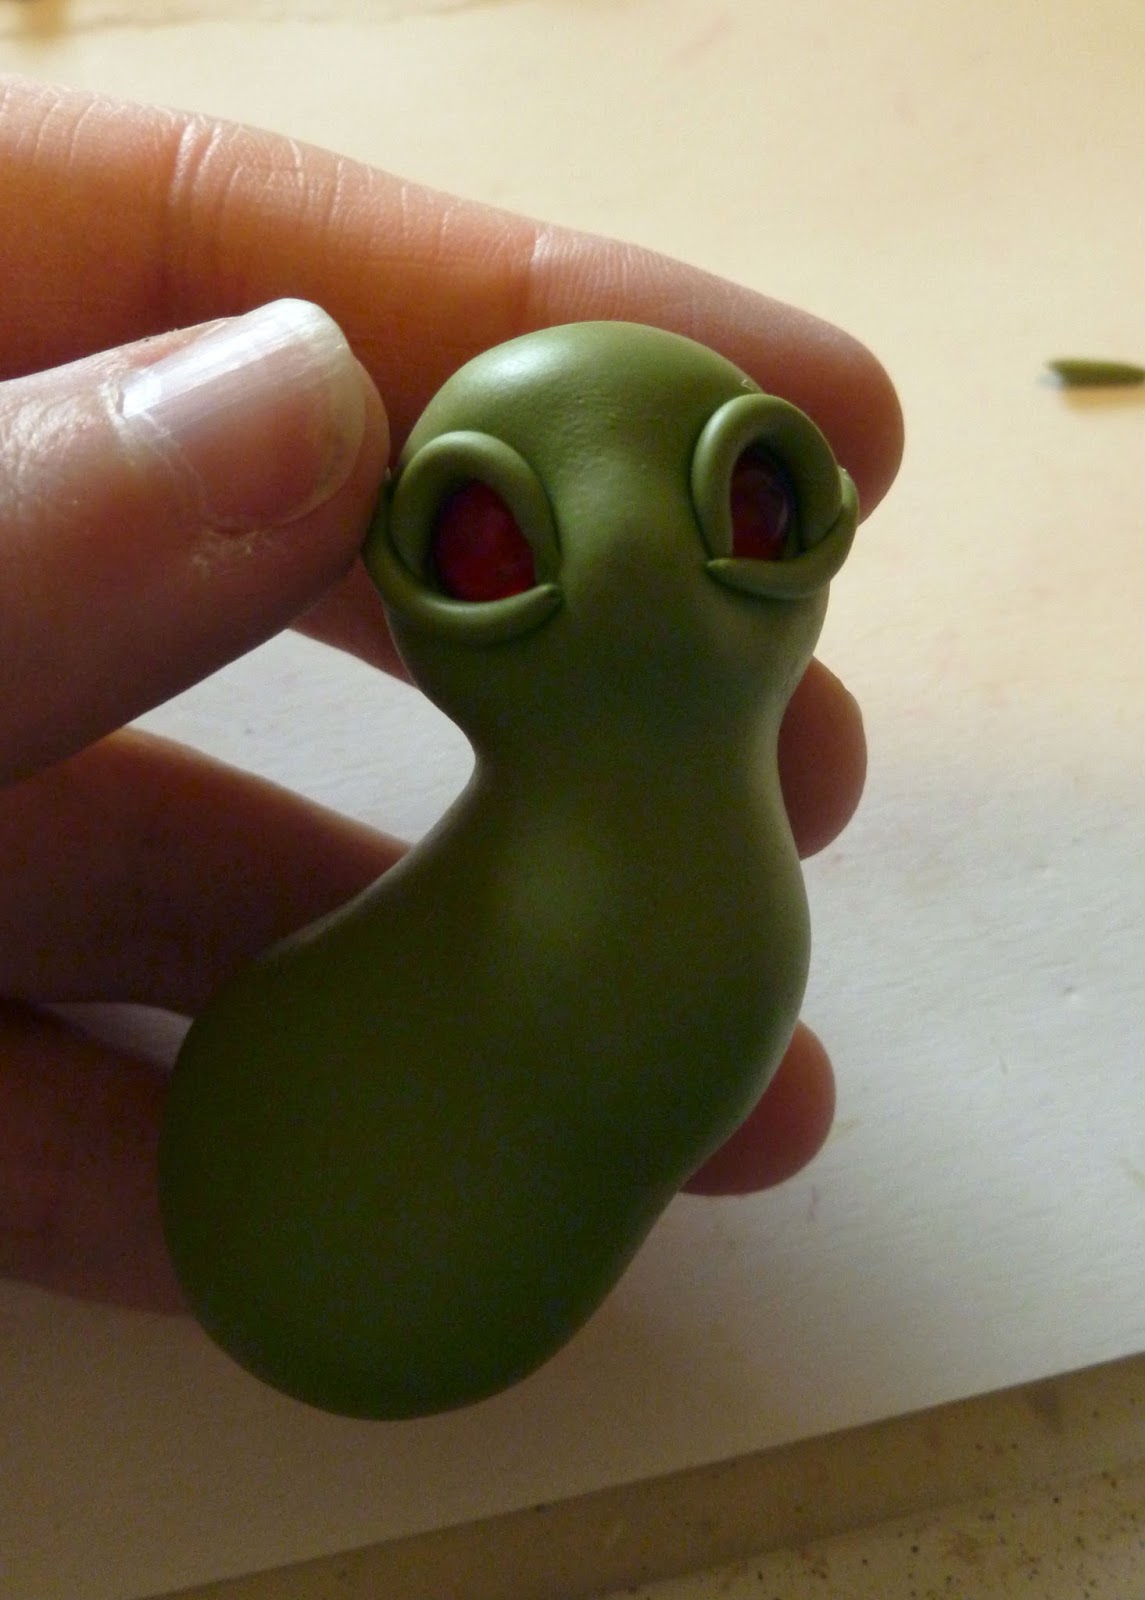
Red glass beads are inserted into the head for eyes.

Then I sculpt eye lids around each bead. Making sure to smooth out each piece of clay that is added to the main rod body.

Gotta give our guys some hips that don't lie. :P
 Smooth those hips into the body.

Now lets make some arms and feet for our little Eldergod. I start with little tear drop shapes and cut three toes into the tops of the drops. Then each toe is smoothed out and given a tiny claw on the end.
Little body parts; bones, skulls and hearts, are made a head of time and then added to the awaiting arms of the mini Thulhus.

And no Cthulhu, cute or not, is complete without their tentacles. So we roll out some thin clay rods, attach them to the tiny nose and twist them about.


The next step is tedious and time consuming but our sculpture just wouldn't be complete without it. Circular tools are used to add small scales to the polymer clay, one at a time.

Clay spines/hairs are rolled out and placed down the back of our creations.


Time for the wings. After sculpting some teeny bat like wings, they are attached to complete our Cutethulhu's look.

Once the sculpture is baked, small details are painted on and our Cutethulhu is Born.
This little Eldergod is ready to make you go mad with cuteness...Sweet Dreams! :)


Cutethulhus just wanna enslave your mind. 
Hope you enjoyed this step by step blog. I only have a few of these unique pieces in stock so make sure to check out my Etsy store for my available pieces.
For more of my work visit my FaceBook and Instagram sites.
Thanks for reading!
~Caralyn