Come enjoy my world of Fantasy and Steampunk creations.

Mystic Reflections' Creations

Mystic Reflections' Creations

Caralyn's Events and Appearances

  • Aug. 30th - Sep. 3rd - DragonCon: Atlanta GA
  • Feb. 23rd-24th 2018 - ConNooga, Chattanooga TN
  • Nov. 17th-19th 2017 - Atlanta Steampunk Exposition: Atlanta GA
  • Nov. 11th - 12th 2017 - Christmas at Lithia Springs High school, Lithia Springs GA
  • Oct. 7th 2017 - RevFest: Rev Coffee Smyrna GA

My Blogs

Let's see what I have been up to. :)

Friday, June 10, 2016

Check out this Crocodile Smile

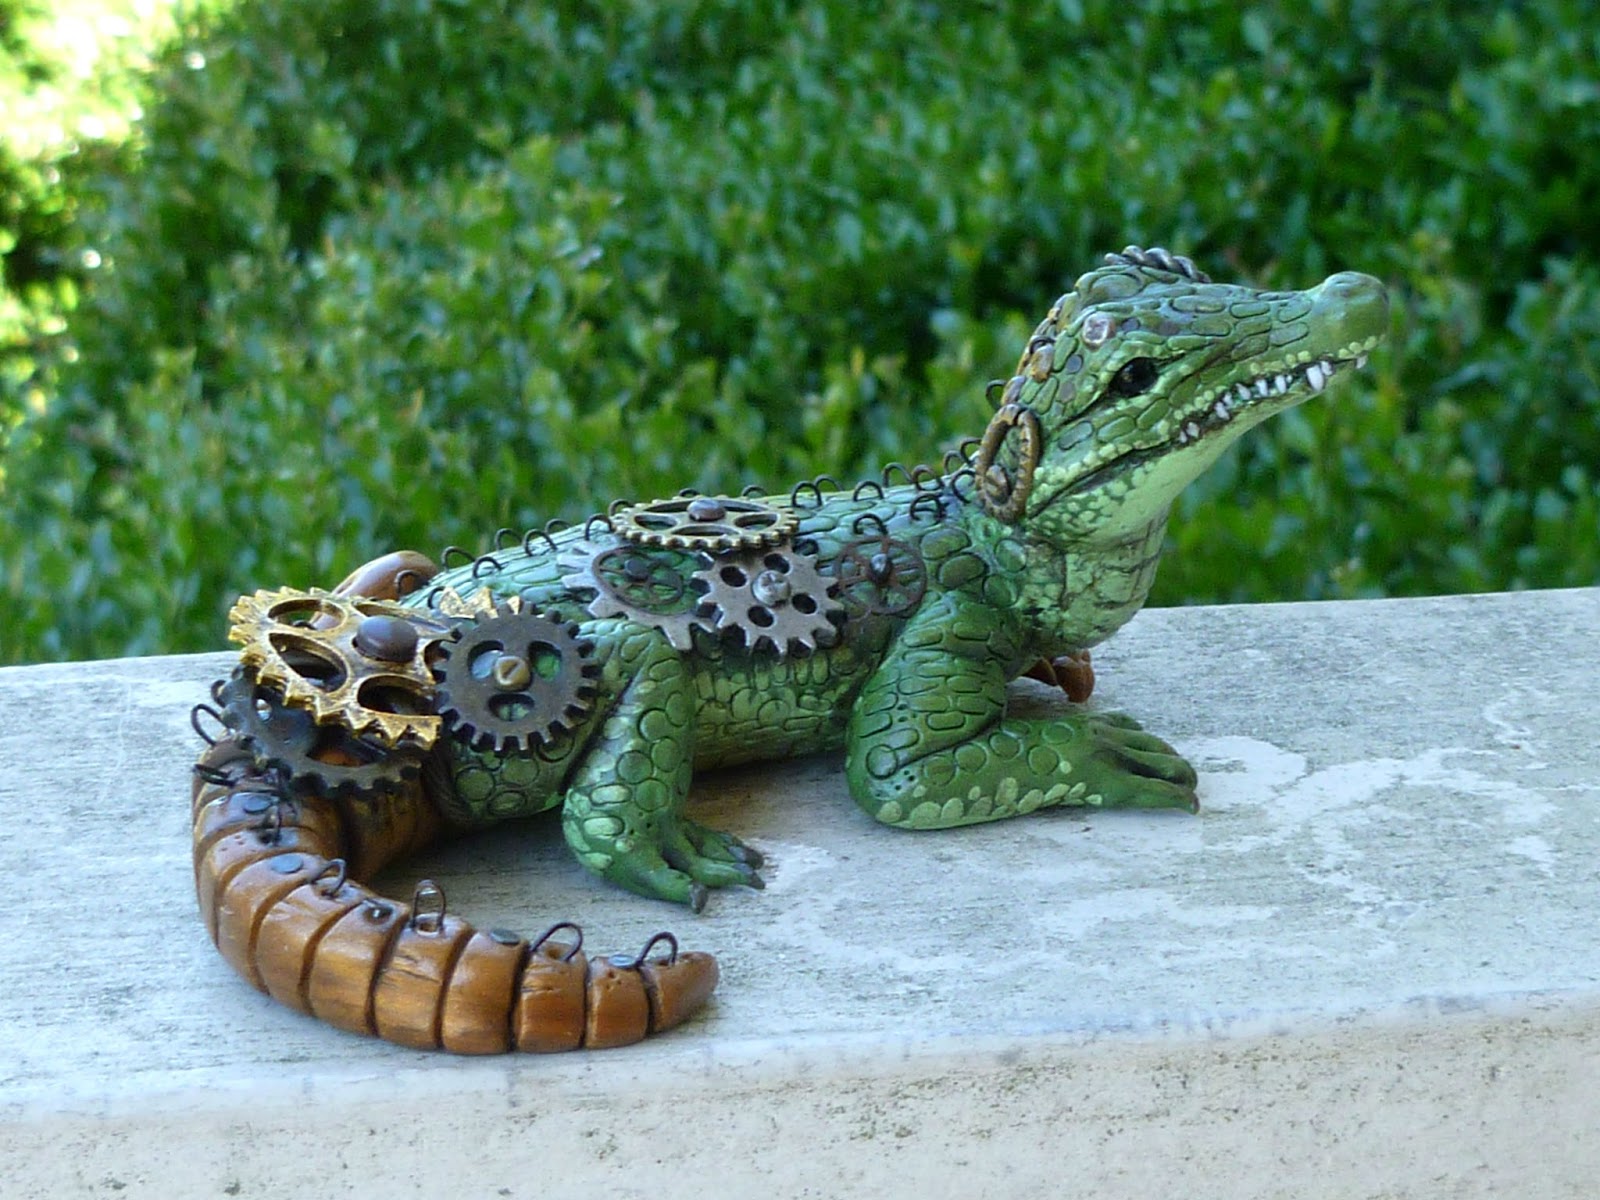
Spent a few days in Florida last month and it got me in the mood to make an Alligator Steampunk Myxie Pal.
I usually start with sculpting the head on my animal pals and just form a rough shape of the animal's body.
 Then you can start to add the details and smooth out the torso shape.
Then comes the limbs, I sculpt each individually and attach it using craft wire frames. 
Once the body is finished, details such as scales and teeth can be added to the piece. 

Gears, Craft wire and metal jewelry pieces are added to give the animal a Steampunky feel. Then the piece is baked and the remaining details are painted on. And your Steampunk Alligator is done. :)


That's one good lookin Gator. :)
For my available handcrafted polymer clay sculptures, check out my Etsy store

Thanks for reading,
~Caralyn

Wednesday, May 25, 2016

Steampunk Cuties

That time again when I crank out new Steampunk Dragon Pals. My last few shows/conventions cleaned out my inventory on these lovable little critters, so I've been working on some brand new little darlings. :)
Here's what I've gotten done, I may work on new Steampunk animal pals for a bit but don't you worry, I'm not done with the fan favorites just yet. :)
Oh and by the way, I was accepted into the Dragon Con Art Show in September again this year so I will be sure to make plenty of these little guys before then. :)
Love the metal butterfly wings on this one. 


Really fun colors on this little guy, the gold and the dark gray make such a nice contrast. 


This little one is my favorite so far....don't tell the others ;P

I have posted most of these guys on my Etsy store, check out the link for my available pieces. :)
Thanks for reading!
~Caralyn

Thursday, April 28, 2016

Whisper to a Hummingbird

I just finished a piece I have been working on for a friend. Her mother-in-law loves Hummingbirds so she wanted me to make something special for her for Mother's day.
I wanted the Hummingbird to appear like it was flying while drinking from flowers, not an easy task but I had an idea of how it would work. I started by making the flowers for the base.
Azaleas are a good pretty Flower to sculpt. 

After all the flowers were sculpted, I attached them to a wood base using glue and craft wire. Then I sculpted small polymer clay decorations to the corners of the wood base.

Just add a small message and painted details and the base is ready for the next step.

Sculpting the little Hummingbird was the most fun, I sculpted the sweet little body and wings separate and then attached them with liquid clay and craft wire.

I sculpted the little bird with a wire going through the length of his body and out the tip of his beak, to help attach him to the flowers. Then details were painted and the little guy was ready to add to the base.

ALL FINISHED! 


I really enjoyed working on this piece, and my friend was very pleased with how it turned out.

For commissions/custom orders contact me through my Etsy store.

Thanks for ready!
~Caralyn

Monday, April 18, 2016

See you later Steampunk Expo

Steampunk Expo went really well, several of my little steampunk pals found new homes and my husband's books were quite popular. It's a young Con but it was very well organized and successful for us, We will definitely try to be vendors at it again next year :)
So many talented awesome people at the show, I came home with all kinds of treasures. Here is just a small sampling of the sooooo many purchases I made over the weekend :P
Dryad Tea made the awesome tentacle mug and super delicious chai tea that I couldn't wait to get home to try. This lady is the funnest person you will ever meet, if you are a tea lover you HAVE to check out her stuff. http://dryadtea.com/

My super fun candles were courtesy of a sweet young artist I had the pleasure of meeting at this show, such beautiful intricate work.
https://www.patreon.com/jennyfranklinartist?ty=h

And for the heavier drinkers out there make your own special brews with these fun flavors at http://www.leloupgaroualchemy.com/

There were many more talented people at the show, I have high hopes for this little convention, make sure to check it out next year. :) 

Thanks for reading!
~Caralyn

Thursday, April 14, 2016

Steampunk Expo is this Weekend!

  Tagging and packing all my new pieces and getting everything ready for Steampunk Expo this Friday through Sunday at the Chattanooga ChooChoo in TN. I've never been to this show before so I'm excited to see what it's all about. I'm hoping for lots of intricate steampunk costumes. :) 

I have several new pocket watches that I have been working on this week, I am hoping the cosplayers will like my newest pieces.


Cthulhu can't be contained in just any pocket watch.


and of course my little Steampunk Pals are excited to be there,


my cutethulhus will be there ready to charm the attendees,


and we can't forget about the Dragon Pals...who could? :)


So if you are there this weekend don't forget to stop on by and say hi to my little guys. :)

Thanks for reading.

~Caralyn


Tuesday, March 22, 2016

What I am Working on for Steampunk Expo

It's been a little while since I've blogged, Facebooking & Instagraming I am good at but trying to remember to blog often ... it's probably just easier to say I am lazy LOL :P
Anyhoo, I have a convention coming up in April, Steampunk Expo. I'm super excited about this show because it will be the first Steampunk Con I've been to, my work should fit in nicely don't you think? :)
So I have been getting ready for the show by working on some new pocket watches. I sculpt polymer clay fairies and animals into hollowed out pocket watch casings to create a sculpture that you can wear. This convention seems to be very cosplay driven so I figured I would make plenty of pieces for the costumed attendees to choose from. So here are a few of the most recent ones I have sculpted.

 Hummingbird; carry one in your pocket watch for good luck. 


Myxies peeking out of their pocket watch world. 


Scorpions are a symbol of protection in some cultures. 

Clever Fox knows how to keep time on his side. 


I am really enjoying creating these new pieces and I hope that the Steampunk Expo attendees with enjoy them too. Well time to get back to sculpting. :)

Thanks for reading, keep checking my sites for more updates on what I am working on.
~Caralyn

Monday, October 26, 2015

First Time Wood Burning Experience

My husband and I just celebrated our 5th wedding anniversary this past weekend. We like to stick to the "traditional" wedding anniversary gifts and this year was wood. So off to Michael's Art Stores to pick up a little wooden box, they aren't expensive and they come in several different styles. The one I got was specifically chosen to hold my husband's Bicycle playing cards collection. Originally I was planning to just draw all over the box with a Sharpie but as I walked past the wood burning tools, I was intrigued to give it a try. They didn't have too many tools to choose from so I purchased the least expensive one, I'm sure there are much better quality burning tools but as a first time user, I wanted to make sure I would enjoy it before spending alot. So now that I had my tool and my canvas, it was time to go home and see if I was going to create art or burn the house down :D
After carefully reading the user directions and making sure I was following the safety tips, such as wearing gloves, I was ready to test out my new toy. I started with a small box I purchased just for the testing of my burning tool. 
Holding the tool takes a bit to get used to, you hold it much like you would a pencil, however you are gripping it higher on it's base so it feels slightly awkward, at least it did to me. Touching the tip to the small particle board box and the wood melted away easily leaving a nice black dot. Dragging the tool along I was able to draw, not as smoothly as you would a pencil but without too much difficulty. Before I knew it, my little testing box was covered in my scorched doodles. Now to move on to the gift box.
I was not happy with the little latch that came with the box so I first replaced that with another I was able to purchase in the wood section.
Then I sketched out the picture I would be burning; there is no eraser for the burning tool so I wanted to make sure I knew where my lines would be. 
Burning this box was slightly more difficult than the smaller box, I am not sure, but I think it was due to more knots in the board. But I was still able to fill my little particle board canvas with lots of art work with a small amount of effort. 
Make sure to always wear gloves when working with your wood burning tool, I was thankful I had gloves on when about half way through my work I smelt leather burning and realize I had rested my ring finger on the hot metal of the tool, had I not been wearing my protection that would have been a painful lesson that no one wants to learn.
After my box was covered in my burned designs I stained it. I am sure that the particle board was mostly to blame but the stain washed some of the burned lines off and I had to reburn them. If I had used oak wood or some other type of wood it may not have erased my lines but it was not that difficult to touch up my piece.


My gift was done and my husband loved it and promptly stored his card collection inside.
I loved wood burning and am definitely going to use my new tool again soon :)

Hope you all enjoyed reading about my first wood burning experience that since I didn't set my home on fire I plan to be doing again :D
Thanks!
~Caralyn 
 

Monday, October 5, 2015

Illustrating a Children's Book

  Twenty-four pages, front and back cover, three sketched rough drafts, over a Thousand hours, lots of hair pulled out and several "do-overs", these are just some of the ingredients that go into illustrating a Children's Book...and I thought illustrating my husband's book covers was a challenge, Whew.
How did this all start, you may ask? Well you have to met the authors first, in my case this encounter took place at Sci-Fi Summer Con 2014, where I met Jay and Katie Barber, a fun husband and wife author duo.
They have written several fantasy novels together despite having two kids and a few cats at home.  Their six year old daughter, Maya, wanted to hop on the author band wagon. She had been creating adventures for a unicorn character named Mend. Trying to encourage her daughter's passion, Katie helped Maya compile the stories together. All they needed now was an illustrator and I was delighted to take on the task. But I had never done a children's book before, needless to say, I had alot to learn.
Designing the characters was the most fun, getting to be creative with Maya's ideas and imagination.
After receiving the sketch approvals from the authors, I began the coloring process. I scanned each of the pages into Photoshop, where I do most of my coloring. Here's a link to show a bit of my Coloring process. 
I have just recently started using "layers" in Photoshop, this was a life saver. Editing text and changing colors or character positions happens plenty while working on a picture book, and making edits after the coloring has already started can be difficult, but layering my images made it much easier. Coloring always takes the most time, but all the detail that is put into each pixelated brush stroke is worth it, once you see the finished piece.
FINALLY I was done and able to get the coloring approved...only a few edits to be made after that :)
Adding the text comes next. Katie and Maya typed up the story so I was able to copy and paste most of the text, with some adjusting of the background and the margins, the book was coming together. Final edits and image tweaks have been made all this week and the proofs for our book have been ordered from the printers.
It has been a long, challenging process, where I have learned so much. I don't want to toot my own horn but I may have patted myself on the back for a job well done. :) And I'm super excited to see what started with the imagination of one little girl, end up on children's book selves all over. :)
"The Adventures of mend" should be available October 15th. You can pre-order it here. :D

Thanks for reading!
~Caralyn