Come enjoy my world of Fantasy and Steampunk creations.

Mystic Reflections' Creations

Mystic Reflections' Creations

Caralyn's Events and Appearances

  • Aug. 30th - Sep. 3rd - DragonCon: Atlanta GA
  • Feb. 23rd-24th 2018 - ConNooga, Chattanooga TN
  • Nov. 17th-19th 2017 - Atlanta Steampunk Exposition: Atlanta GA
  • Nov. 11th - 12th 2017 - Christmas at Lithia Springs High school, Lithia Springs GA
  • Oct. 7th 2017 - RevFest: Rev Coffee Smyrna GA

My Blogs

Let's see what I have been up to. :)

Tuesday, September 6, 2016

Dragon Con is Over...Time to sleep


Was such a great Dragon Con! Had so much fun seeing all my Con buddies and getting to meet all new people. I won two awards for my pieces EEEEEPPP, so now I won't have to go through the jury process to get in to Dragon Con next year, SO EXCITED! :D


Almost all of my little guys found new homes, I will be posting the few remaining sculptures to my Etsy store this week.

Thank you all so much for coming by to see me and my little friends. Everyone was so nice and positive and just made the 4 days so awesome!
BIG WELCOME to all the new Mystic Reflection followers! :D
And super special Thanks to my dear friends and family who I would never be able to survive this huge busy show without their help.
Looking forward to next year. :)

Thank you for reading!
~Caralyn

Wednesday, August 31, 2016

The Steampunk Pals take Dragon Con!

Last day to get things in order before we leave to set up at Dragon Con. I am packing everything up today, all my little creations will be wrapped and put in tubs for the ride to the Hyatt Regency Hotel, which will be their home for 4 days. They are super excited.

I will be in the Art Show September 2nd through the 5th. I have a Gallery, Auction Table and a Booth where I will have prints and sculptures available. My booth is on the back wall where I usually am, the 8th table from the right but you can just look for the Mystic Reflections Banner. I will have new prints available at my booth along with my Steampunk animal pals, Gryphons, Dragon Pals and their Steampunk Dragon cousins.


Also this year I am going to try something different and I hope fun...Mystery Boxes! Each Box will contain a retired Myxie or Fantasy sculpture, these mystery boxes will be $50 each ($100 value sculptures) I only have 5 available. Exciting to see which piece you might get.

I hope to see you all there, Lets get this Con started! :D
Thanks for reading
~Caralyn


Monday, August 22, 2016

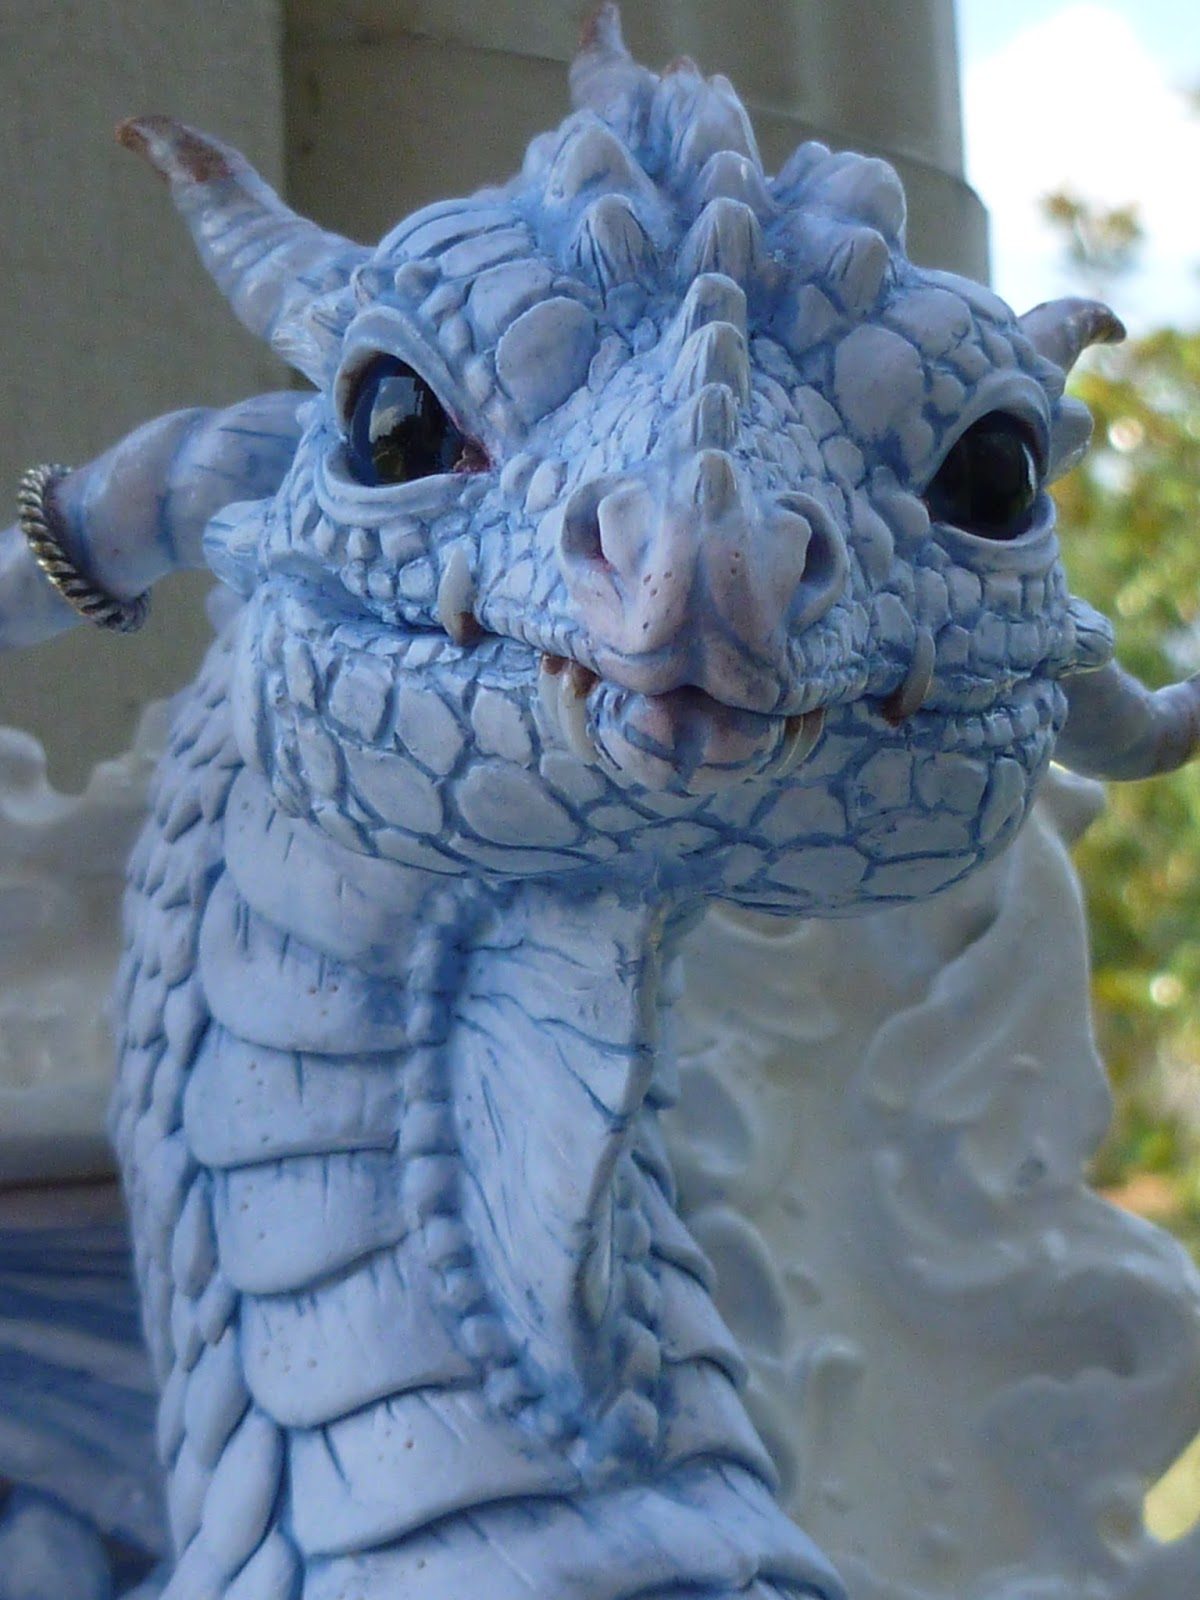
How to Make your Dragon

I have had a soft spot for Dragons since I was a little girl. Then I grow up and still can't get enough of them, it's obvious from my collection of little hand-sculpted polymer clay cuties. I have been sculpting Myxie Dragon Pals for several years now :)

But I thought it would be neat to make a big one. So first I started with the general shape I wanted. This Dragon was going to be framed so I was just sculpting the head and neck. 
After pressing in his glass eyes I sculpted the details on the face. With a sharp clay tool I etch each scale into the soft polymer clay. His teeth were sculpted using transparent polymer clay so his toothy grin would look more realistic. 
Not sure what the fleshy part hanging off the neck is called but I've seen reptiles with one so I assume Dragons have one too... so I sculpt one on my Dragon and add more horns down the back of his head :)
After adding his chest plates, a plate at a time, I then add his scales, placing each one by one. Making sure not to forget to add the scales in the frame background to give the appearance that he is coming out of the frame. The process took a while. 
Once each scale was in it's place I was able to attach his large horns. And then he was ready to be baked. Usually with my larger pieces I bake them in sections but I was able to heat this guy all at once.
 Now to paint on the details and my Dragon is ready to hang on anyone's wall. I painted in all the cracks and corners with dark blue paint and then wiped the excess off to make the end result a lovely light blue.


This Dragon was such an awesome experience. I was able to stretch my creative muscle and try out techniques that I haven't been able to try on my smaller pieces. This piece took me over 30 hours and approximately 7 ounces of polymer clay to complete. He stands around 8 inches tall and is probably my favorite of my sculptures right now. :)
This dragon will be displayed in my Gallery at the Dragon Con Art show in September for those of you that would like to see him in person. 
I hope you all enjoyed my Step by Step process. 
Thanks for reading!
~Caralyn 


Tuesday, August 9, 2016

Dragon Con is that you?!

Hello everyone! So as some of you may know I am getting ready for Dragon Con currently, a Fantasy/Sci-Fi convention in Atlanta at the beginning of September...it is right around the corner EEP! 
For the past 8 years I have been part of the DCon Art Show, where I have a Gallery/Auction table and a vending table. I will finish up the gallery pieces this week hopefully, here are just a few of the newest pieces that will be available in my Galley. 
"Pick a Card" Jester Framed Sculpture

After the gallery pieces are complete, I will work on the pieces for my vending table. On my table I sell prints, pendants and Steampunk animal pals which you can see on my Etsy store.
My polymer clay sculptures are all handmade one of a kind and I do not use any molds so in-order to make sure I have plenty of inventory for the Art show I have to get started several weeks before. My little Steampunk critters are a fan favorite so I better get back to work. :)

Make sure to keep checking my blog and FaceBook page to see my progress. 
Thanks for reading!
~Caralyn


Sunday, July 24, 2016

Step by Step Framed Harpy Sculpture

I really enjoy working on my Framed Sculptures. I just love the thought of a picture that is 3D hanging on the wall. I wanted to keep this piece very simple, keeping the Harpy the main focal point of the piece by not adding alot of frills to her.
I started with the head, definitely my favorite part to sculpt.

After I get the head and face the way I want, I move on to the body. I usually sculpt the body in sections or layers, baking the piece between each layer. The arms and hands are normally the last part to be added.


Now to make her wings.I went with a gold and brown color.

Secure her in the frame and add her wings and horns. 


Now she ready to have details painted on. 


And she is all done and ready to be featured in my Gallery in the Dragon Con Art Show in September.

Keep checking my blog for updates on what pieces I will be bringing to the show.
Thanks for reading!
~Caralyn

Thursday, June 23, 2016

Riding a Steampunk Carousel

    I have always loved carousels ever since I was little and didn't have people yelling at me to get off and let the children have a turn...Who says adults can't go to carousels and ride while screaming that they are a princess...Annnywhoo
So I made my own carousel horse and due to my love of all things steampunky, I put a fun little twist to the traditional carousel ride. :)
It's all about dat base so that's what I started with, take several small wood circles, glue them together and drill a hole through the center. ( I got my husband to help with that part because I can't be trusted with power-tools.:P ) Then paint your base, I used white and gold.

 Now for the main part. Sculpt a rough shape of your horse; I usually sculpt the body and limbs separate. After you finish the details on the face you then attach the limbs to the body with wire.


Then you can sculpt any more details to the piece. I usually sculpt pieces that stand freely but this sculpture was a little more challenging because I had to sculpt each part while it had a large wire through the center of it. Made it very difficult to put down, and figuring out how to bake my horse was another chore entirely.
Time to add the steampunky accessories! Using clay and metal jewelry and watch pieces I bring my steampunk carousel horse to life.
All Done! Despite the size of this sculpture, he almost looks like he could carry children around and around until they got sick. FUN!!! :D


I am super happy with how this piece came out, I would love to make a few more steampunk carousel animals but I am not sure if I will be able to with the up coming Dragon Con Art Show I will be attending in September.
Keep checking out my Blog and FaceBook page to see what all I will be working on as the show approaches. :)

Thanks for reading.
~Caralyn